|
|
|
William Scott
I often hear people talking about “White Revolution”, surviving a collapse, etc., but then I look around and see too many fat guts and skinny arms, especially on folks over 30 who work in offices or other non-physical jobs. (I was there, I know.) That’s not the best material for any revolution. Its bad enough for us older folks to be hauling around an extra 10, 20, 30 or more pounds on a weak body, but a twenty year old that’s packing around that kind of blubber definitely needs to get busy.
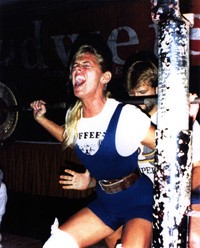
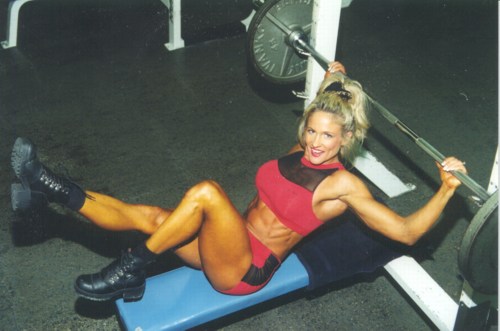
While the Internet has been a great and useful tool in our struggle, its also no secret that sitting around pecking on a keyboard for hours probably contributes to the fat gut/skinny arm syndrome as much as anything. While bigger arms probably aren’t something women care about, I know many gals are worried mainly about their belly, butt, and legs. This workout will help in these areas, so it’s not just for men.
If you are over 35, check with your Doc before doing this program. I assume you have no physical problems.
Being that I use a computer probably as much as anyone and also tend towards laziness, I eventually was forced to confront the physical deterioration that happens with age and have progressively bought and built some decent workout equipment to use in my home. I know that many people don’t have the space, money, or ability to make their own exercise equipment, so, in the interest of our race, I decided to create a practical, ultra-simple, physical workout for all the cyber revolutionaries out there. You don’t even have to go very far from your computer to do it. That way you won’t run the risk of missing the most recent email from your favorite racialist mailing list!
Ok, before we get into the actual workout, here are a few things I’ve learned about exercise and physical training:
Ok, are you ready? The first workout will work your chest, back of the arms, and, to a lesser degree, shoulders. Now this is simple.
Day One: Chest and Triceps
Do fifty pushups. (Gals, shoot for 25 push-ups pivoting on your knees like you did back in gym class.) Ok, ok, I can hear it now: “That’s a lot. I can’t do that many.” Relax. You don’t have to do them all at once. Do ten or even just five if that’s all you can manage. Then rest for a couple of minutes (read a few emails) and then do as many as you can again. Rest; try it again, even if you can only get one. Guys, if you get to where you can’t do one, then switch to girl-style push-ups. You know, instead of being on your toes, pivot from your knees. Anyway, keep going until you do fifty even if it takes all day. You’re sitting around at the computer anyway, right?
Once you get to where you can do twenty without stopping, get a chair and put your feet up on it. This will shift more of your bodyweight to your chest and arms. Go back to trying for fifty push-ups. Another variation you can try is changing the distance between your hands. Putting your hands close together under the chest when doing a push-up places more emphasis on your triceps, (you’ll feel it). A wide position will put more stress on the chest.
Ok, the fifty are done. You’re finished for today. And guess what, you get tomorrow off! As ol’ Hymie would say “Oy vey, such a deal!”
Warning: If you’re not used to exercising, you’ll probably be sore in a day or two, but that’s ok. The soreness will decrease. Think of it as weakness leaving your body. However, let me say that if you feel any sharp or unusual pain while doing an exercise, STOP and find out why.
Day Two:Relax.
Day Three: Back and Biceps
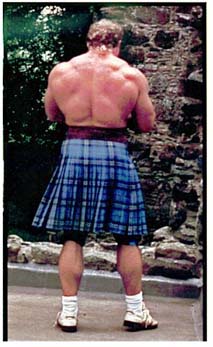
The “big back” of a top Highland games competitor. I don’t know if this guy is on steriods, but in any case you can’t develop a strong, well-muscled back without heavy exercises. Pull-ups and chin-ups are two of the best back exercises.
Before you can do anything, find something you can use as a chin-up bar. If there’s nothing available, you can get an adjustable one that fits in a doorway at most department or sporting goods stores. They’re cheap. If you don't even have that much money, use an opened door. Grab the top edge and do pull-ups that way. Put a towel between your knees to keep your legs from dragging. It will be a little harder that way, but what the hell, you're an Aryan. Anyway, follow the same rep scheme as you did with the push-ups. Grab the bar with hands about sixteen inches apart and your palms facing you Your arms should be fully extended. Bend your legs so they don’t hit the floor. Now pull yourself up, pause, lower your body ALL THE WAY down until you are hanging by your arms. This is a chin-up, (and please don’t do the silly cheat version where you get your chin over the bar, then drop down only a few inches or maybe a foot and quickly come back up. That’s bullshit and isn’t doing you much good. Go all the way to the bottom.) A pull-up is where your palms are facing away. These exercises are great for your whole upper back and front of your upper arms. Holding onto the bar strengthens your grip. It really hits those back muscles below your arm pits, (the ones that give a man that V-shaped upper body). The chin-up will put a little more strain on the biceps than the pull-up. Chin-ups are a little easier to do for most people. Try both and see which you like better.
Ready, go for fifty even if it takes all day. (Gals, again, go for 25.) What if you can’t even do one? Don’t worry, there’s an answer. Jump up and grab the bar, now support your weight as long as you can and then lower yourself. That's one rep. That’s what’s called a negative chin-up. You gals will probably have to start with negatives. If you still have trouble, put a stool under the bar. Put your feet on the stool and take just enough of the weight off your arms so you can do the chins. No matter how you have to do these, try to get fifty no matter what.
Day Four:Relax.
Day Five: Legs and Lower Back
Ok, do you still remember those deep knee bends from high school? Can you still do ten? How about twenty? Just go slowly and don’t bounce, but go down only until your thigh is parallel with the floor. That’s called a squat. If doing twenty is hard, follow the scheme of trying to do fifty by doing however many you can, then resting, then trying some more, rest, etc. until you get fifty. If you can already do fifty while only taking two rests or less and without tremendous effort, then you need to make things a little more difficult. Get two five-gallon buckets. Put an equal amount of sand, bricks, water or even kitty litter (unused) in each bucket. Hold these in your hands allowing your arms to hang down at your sides and do the knee bends or squats, as we will call them. As an alternative, use one bucket between your thighs, holding it with both hands. This may be easier to balance than one bucket in each hand.
A very important thing is to keep your back as straight as possible when doing this movement. I don’t mean you have to keep your upper body completely vertical, but that your back shouldn’t be humped over. Your spine should be straight. This will help to prevent a back injury.
After doing these a while, you might want to get into a more structured workout. For example, do ten, rest three minutes, then do ten more, rest, ten more, and so on until you’ve done five sets of ten. Once you get more than about twenty pounds in your buckets, you should first warm-up before trying the squats with the weighted buckets. Do ten or twenty squats with just your body weight, then rest a couple minutes before using the buckets.
Ok, we’re not done yet. The squat puts emphasis mainly in the front of the thighs, but we can’t forget the back of the thighs or hamstrings. If you’re not using the buckets, stand up straight and bend over at the hip keeping your back straight and with only a slight bend at the knees. Bend over as far as is comfortable. Return to a standing position. Do fifty of those taking as many rests as you need.
Do you feel like doing it with some weight? Ok, take one bucket and hold it in front of you with both hands. Bend at the hip as was previously described and return. Try to keep the bucket as close to your legs as possible. Do ten, rest three minutes and repeat until you’ve done fifty. Congratulations! You’ve just done what’s called a stiff-legged deadlift.
You have another part of the leg to work, the calves. Now calves can take more reps than the rest of your leg. Think about it, your calves are working almost all the time. Also, you don’t need to rest as long. For the calves, hold a five-gallon bucket in one hand and rise up on one foot like you’re standing on tiptoes. Do twenty-five; rest a minute, do twenty-five more. Do fifty on each leg. For more emphasis, put a block of wood under the front part of your foot when doing this movement - a two by four works well.
If you’ve really worked your legs well, I’ll tell you now, they’re going to be sore, not the next day, but the day after. It will hurt to walk up steps, but you will manage. The more you workout though, this soreness will decrease to where you’ll only get a little sore. BTW, this soreness is what’s called Delayed Onset Muscle Soreness or DOMS. Nobody really completely understands what it is, but its not dangerous or harmful. As a general rule, if you aren’t at least a little sore after a workout, you probably didn’t put much into it.
Day Six: Abs
Do fifty sit-ups or crunches following our “go for fifty scheme.”
Day Seven: Rest
Day Eight: Repeat cycle.
IMPORTANT: Always try to improve every week. Try to lift a little more weight or just get one more rep without resting as much or as often, but don’t push too hard. Even if you only improve a little, that’s enough. Your muscles will adapt. That’s how you get stronger.
Persons who are grossly out of shape or older should ease into this workout gradually by concentrating on form and stopping two or three reps short of your limit on all exercises. Gradually work up from there as you feel comfortable.
Ok, there it is. A very basic workout routine that costs virtually nothing and will give results. There’s no excuses now! Haha. Of course, after a while, you’ll probably want to ditch the buckets and get some real weights and a more involved workout, but the ideas are the same. The point is you don’t need much room or spend any money to get into shape. Before long, you’ll only be spending three hours per week on this workout. Just stick to the compound exercises as the core of your workouts and put some reasonable effort into it. I promise, this workout will work if you stick to it.
Keep a workout journal. Its doesn’t have to be fancy. Just a notebook. Keep track of the dates you workout, your weight, the exercises you do, how much weight you used, how many times you had to rest and for how long. Stay with the workout for a month and then look back at where you were when you started. You will probably be surprised at the progress you made. Good luck.